Showing posts with label Stamping. Show all posts

Sunday, September 15, 2013

Never wishi WASHI!

I have a new love for Washi Tape!  It is available just about everywhere, even Walmart, in great colors and designs.  I have started a nice little collection (er, obsession) and this is a fun, easy note card in one of my favorite color combos....

Cut base cardstock 4.25 x 11, scored at 5.5, folded at the top.
Use corner rounder on the bottom corners.
Cut two white pieces 4 x 5.25, also rounded on the two corners.
Add three strips of color coordinated washi tape.
Stamp the cat first (Studio G stamp)
Then stamp "hello" (Studio G)
Add second white card to inside as liner.
Great in any color combo :o)

I hope you will enjoy making some fun, easy cards to say"hello"!
Hello, Anna!
I'll be back soon with a cool Christmas card!

Happy crafting ~
Photobucket

Tuesday, June 18, 2013

Simple Silhouette Images

This month's Friday Try-Day cards featured several varied techniques, as usual, and I'll start with this trendy look of using a detailed stamp, and blocking it out to make it a silhouette.
We started by punching a sticky note "sun" and deciding where we wanted our horizon to be.  
Sketch in a very light line with a permanent pen.
Using a stencil brush and yellow ink, brush back and forth to add the yellow layer all the way across the card.  Place the sun mask along the horizon in desired position.
Now begin brushing in layers of orange, pink, and purple for the sky.
Add blues and greens for for the water.
Stamp the bird, tree and grasses.  
Color in all open areas with a marker, creating the silhouettes, extending any areas to edges as necessary..
Use a fine line pen to add water movement lines. 
Add your sentiment of choice to the water area.  

This technique works best as a card front layer, as the marker will bleed through the cardstock. 
Mat and add to folded card for finished card ready for presentation. 

This works very well with all sorts of stamped images, including ones that didn't give a good impression the first time, and can be saved this way!  

I hope you enjoyed one of our Friday Try-Day projects, and will give it a TRY yourself!

See you again soon with more ..........
Happy crafting ~

Photobucket

Sunday, June 9, 2013

Friday Try-Day Cards and Projects

Last month our Friday Try-Day project was a Card Box ensemble to hold cards for all occasions.
It is nice to have an organized place for all of the cards we create as we are learning all of the new techniques we try out, and those great designs we CASE from Pinterest!  LOL

Today I am sharing one of our Friday Try-Day cards from April, which was waiting in the box for a time, sadly, when it would be needed to cheer someone in need.
"Just a Little Prayer"
The inside sentiment says "That God will keep you in His care".
That seems appropriate for the 
I FEEL THE LOVE PROJECT for this month.
This blog, and the work they do is very precious to me. 
Madison, the teenage founder of this Non-profit organization is a talented
young woman with a giant heart.  Since she was 16 years old she has chosen a different family
 each month that could benefit
 from receiving handmade cards. 
This month's story is of a 6 month old angel named 
Baby Mason
who was born with special needs,
and then tragically died at the hands of a drunk driver. 
My card will be delivered to his grieving parents.
I hope you will take a moment to check out this website, and 
perhaps join in sending a card...
There is a new mission every month.  

The lace stamp set as well as the sentiments are available from Close To My Heart.
The lace was heat embossed in white onto pale gray cardstock,
then distressed with Sapphire Blue ink over the top.  Use a paper towel
to buff the image and bring the white back to brilliance.
The butterfly was cut from the Art Philosophy Cricut cartridge, also from CTMH. 
The pearl brads are from Making Memories.
Mat with black, and mount on a blue card.
Line with another gray insert with the sentiment stamped in blue.

I hope you are inspired to do something creative today.

Happy crafting ~

Photobucket

Tuesday, February 12, 2013

Mustaches and Vellum

It's Valentine Week, and I hope you are enjoying time with loved ones in your life.
This is a CAS card that I did for my 4 year old grandson, along with about 50 mustaches
for his friends!
The mustaches have a hole in the center for sliding up over a lollipop and Mommy can use my 
word program for making tags for all of his Valentines.  
He is one very excited little fellow!  His little sister looks adorable in her 'stache, too!

I was at StampFest this past weekend, and it seems that Vellum is making a big comeback... 
as if it ever really went anywhere!  But there were lots of vendors using vellum in their projects.
Join me Tuesday evening at 8:00 for my UStream class, and 
we'll take a look at several card projects, including this beauty above.  
Just click on the blue icon in the upper right corner and it will take you there.
Looking forward to streaming with you!

Note about ATG Tape!
I have a new shipment arriving any day now. 
Get your orders in right away.  
There is going to be a new price soon, and you 
want to stock up before it changes!!!
Get 'em while you can, and I haven't changed my postage prices, yet,
but I will very soon, so if you get there before I do, lucky you!

Happy crafting ~

Photobucket

Tuesday, June 5, 2012

Birthday Train

All Aboard!  It's Porter's fourth birthday (already??!) and he has asked for "a train to go around the tree" for his birthday.  I asked him what tree?  He said "the Christmas tree"... he wants a very pricey
Polar Express train for his birthday.  I asked him who he thought might give him this wonderful gift
for his birthday, and without batting an eye he said "Santa Claus!"  His Mom and I nearly cracked up!  We quickly informed him that Santa doesn't do birthdays, too.... so he told me Mommy would be getting him the train, then... Oh, the sweet faith of a four year old.  When I asked what he would like Nana and Papa to send him, he said "A Yo-Yo" .... whew, we get off easy! 

This is the card I made for my little Engineer.  The stamps are a favorite old set from Close To My Heart, and the paper is from DCWV Celebration Stack.

This is the inside.  The pennant is a moveable feature, so he can run it along the twine and point to the numbers.  The section along the bottom is a pocket which carries a gift card, so he can be the big brother and take his little sister out to lunch, and cash for going shopping for a yo-yo!!!

I will be linking to I{heart}2stamp.com for their sketch challenge this month.  I encourage you to give it a try. 

***Note:  I had announced that my UStream Class for Tuesday evening had been cancelled due to Bob the Babe's health situation.... however, I am more than happy to say that he has made a very unexpected turn for the BETTER and I should be able to have class tomorrow night!! 
I hope you will be able to join in for
50 Ways To Love Your Digis!! 
Just click on the blue icon in the upper right corner, log in, and you are in the class.
We start at 8:00 eastern time, though we begin visiting a few minutes earlier.  Come and play!
There will be a freebie for you :)

Happy crafting ~

Photobucket

Friday, May 11, 2012

Stamp Around the Page ~ Happy Mother's Day

I want to wish each of you a Happy Mother's Day, whether you are a Mom or not...
you have an influence in the lives of children.... they are watching!

This card was made with Martha Stewart's Stamp Around the Page set,
as well as elements cut with the Martha Stewart Elegant Cakes Cricut Cartridge,
and the Flower Shoppe Cartridge.

There were a number of reviews of the Stamp Around the Page set that revealed some design issues, so I addressed these "problems" and now get GOOF-PROOF images every time!
I have done a video to help you with perfect paper placement, too.
I hope you enjoy it!


Thanks for watching! 

I have classes coming up on Tuesday in Studio Bee if you want to know all about using your Circut, and on UStream Tuesday evening at 8:00!  Looking forward to seeing you soon.

Happy crafting ~

Photobucket

Tuesday, May 1, 2012

MS Stamp Around the Page

I have something to share with Martha!  I will be showing some "Perfect Every Time" tips for the Stamp Around the Page sets, as well as some other card goodies in my UStream TV class tomorrow night.  I hope you will be able to join in the fun!
Just click on the blue icon in the upper right corner of my blog to go directly to UStream/BettyBeeDesigns   The class starts at 8:00 eastern time.  As always, if you can't make it live, the classes are recorded, and you are invited to pop back and watch them at your leisure.

See you then!

Happy crafting ~


Photobucket

Tuesday, April 24, 2012

New and Revisited... Cards


This week's card class had three delightfully different techniques for the ladies to try out...
You saw the fun and cheerful layered sunflower card in my last post.

Here is the flashback project we revisited:

 This Criss-Cross Card was created in kraft colored paper, and layered with celebration papers, and borders were punched with Martha Stewart edge punches.  Add a belly band, and it is a fun way to send special greetings anytime of the year! 
 This shows the tag removed from the inside of the card, ready for your message.  This card can also be done in a horizontal mode, like this one from a couple of years ago:

Here's the link on this style Criss-Cross Card.  Hope you like it!

Our next beautiful creation was done with the new Martha Stewart STAMP AROUND THE PAGE stamping set.  I will be doing a video very soon showing some of the tips and techniques I have come up with to help make this is a very easy to use set, with great results.  The ladies made fabulous cards!

This was made on cream cardstock with copper cardstock on top, which had been punched with a Martha Stewart Punch Around the Page punch set to create the layered background.  The sentiment was a layered combination of Studio G and another small stamp that I had.  I will be sharing
these tips soon... (See the note at the bottom of the post.)

AND... Last, but certainly not least, here is a sample of the brightly colored creations made for
Little E's First Birthday Celebration!
 There were lots of banners, posters, cupcake toppers, a big 1 tied with ribbons, and other goodies... check out BettyBee Designs FaceBook page in a day or two to see the whole array!

And the Birthday Princess came by the hospital to visit with her Papa... who,
unfortunately, couldn't go to her party :(
She brought her smiles to him.

That brings me to my NOTE for this week's UStream Class... due to Bob the Babe being in the hospital, I will not be holding class. See you next week...
Wishing you all the best.

and Happy Crafting ~


 Photobucket

Monday, February 27, 2012

Exploring Alcohol Inks

This sweet image was colored with Alcohol markers...
now, the question is was it with Copics, Sharpies, or Bics???
This darling old Daisy Kingdom stamp was stamped with Memento Tuxedo Black ink
onto Beckett white cardstock, then colored with alcohol markers.
Thanks to Gina K at StampTV for the recessed image layout inspiration.
Add a satin ribbon from my April Ribbon Kit (coming soon!), a few Prima gems,
and it's a charming card to welcome Spring!
                       Here are a couple of examples done with the different types of markers. 
 I tried to keep it in the same color ranges, and the same number of makers,
 so you could see the comparison.
This photo shows the Copics used on one of the images....
....and this shows the array of Bic markers I used on the other.
Tuesday night at 8:00 eastern time, I will be doing a class on Alcohol Markers.
I hope you will be able to join in!
Bring your markers, images, and play along :)
Click on the UStream icon in the upper right corner of the blog,
and it will take you right to my channel.
All classes are recorded, so if you miss one, you can always go back and catch up!
Happy crafting~


Photobucket

Wednesday, February 16, 2011

Just for Fun ~ Featuring Copics


As I was preparing for a Copics class this week, I was playing with some long ignored stamps, and this is what came out of it...
 The top card is being sent to my dear Sister-in-Law, who is celebrating her 85th birthday on the 19th!  Happy Birthday, Ginnie!!! 
The one below is waiting in my stash for just rhe right occasion... it is a single stamp that I did twice, using a mask to cover the bow on the second image, so I could have a little boy kitty, too.  This is the first time I've used the sentiment stamp, but the one at the top is a VERY old favorite.  Cute, huh?
Just a reminder that it's Sweet Treat week over at BettyBee's Buzz, and the girls have some really great ideas on gift card holders, candy boxes, and special presentations.  Plus there is blog candy, and some surprises!  I hope you'll pop over and check it out!

Update on Hubby ~ Thanks for all of your kind thoughts and prayers ... he is home from the hospital, and doing very well.  The procedure went just fine, and they results were better than we had hoped for!  With a change of medications, and continued blessings, he will be here a long, long time!

Happy Creating ~

Betty

Saturday, December 12, 2009

A few things to share today

I know you think I've been lost - not really so, but I'm down with bronchitis, and haven't been posting for a while. Thankfully, it's not the flu, and I'm on the mend. Thanks for your prayers and good wishes.
Here are a few goodies that I've done, but haven't gotten posted......


This features the new Cuttlebug Christmas tree folder on the red background, and the green section is punched with Fiskars corner and edge punch. The stamp was done in evergreen embossing powder and highlighted with red and gold Sakura pen.


This fun tree was done with a new Penny Black stamp that my hubby surprised me with. I stamped the background trees first, by stamping the ink off onto scrap paper first, then stamping the image onto the card. Then I did the central tree. I used a LaPlume pen for the berries on the tree. The birds were drawn free hand, and colored in with LaPlume pens. I highlighted the glisten on the tree with Stickles. The snowflakes are a Martha Stewart punch.


Happy anniversary to Emmanuel and Claudia :) He asked me to make this card. She loves stars and their favorite colors are purple and blue.


These little fellows are made from tags and punches! Aren't they cute!?


Happy Birthday to my daughter, Barbie! This card is created with one 8 .5 x 11 sheet of cardstock. You can see how it is folded, with the bottom turned up to create a pocket for holding a gift card or other goodies! The cut away section allows the top flap to fold down and hold the card shut. fun!


Be sure to follow the 12 Days of Christmas going on over at Cuttlebug Challenge between now and Christmas Eve! The design team has lots of beautiful ideas to inspire you for now and into the New Year. I hope you are enjoying your Christmas Season. Blessings to All and Happy Hanakkuh to my Jewish friends!!

Wednesday, October 28, 2009

Cuttlebug Challenge #55

We have a new sponsor this week at Cuttlebug Challenge, and I have to admit that this was just a bit of a stretch for some of us. I've seen My Favorite Things stamps for quite a while, and am quite a fan of a lot of them, but this one was a challenge for me. It is called On The Pier, and somehow it just seemed to be the wrong time of the year for me. The reason they choose to leave the heads off of their designs, is because they like them to be "any woman"...

Here I chose the Ornamental Iron Cuttlebug Folder to create the Wallpaper on Core'dinations paper. The soft yellow with the lighter yellow worked really well. I added acrylic for the window, and used a white Sakura Souffle' pen to draw in the window panes. It is great, because when it dries, it sort of puffs up, and gives a great, bright white look. The curtains were made from shiny copper ribbon, and attached with glue dots. The sentiment at the bottom was computer generated, and reads "The road to a friend's house is never long." I cut it with a tag Coluzzle, just turning it around to give the decorative end on both ends. The gem leaves are from JoAnn's.
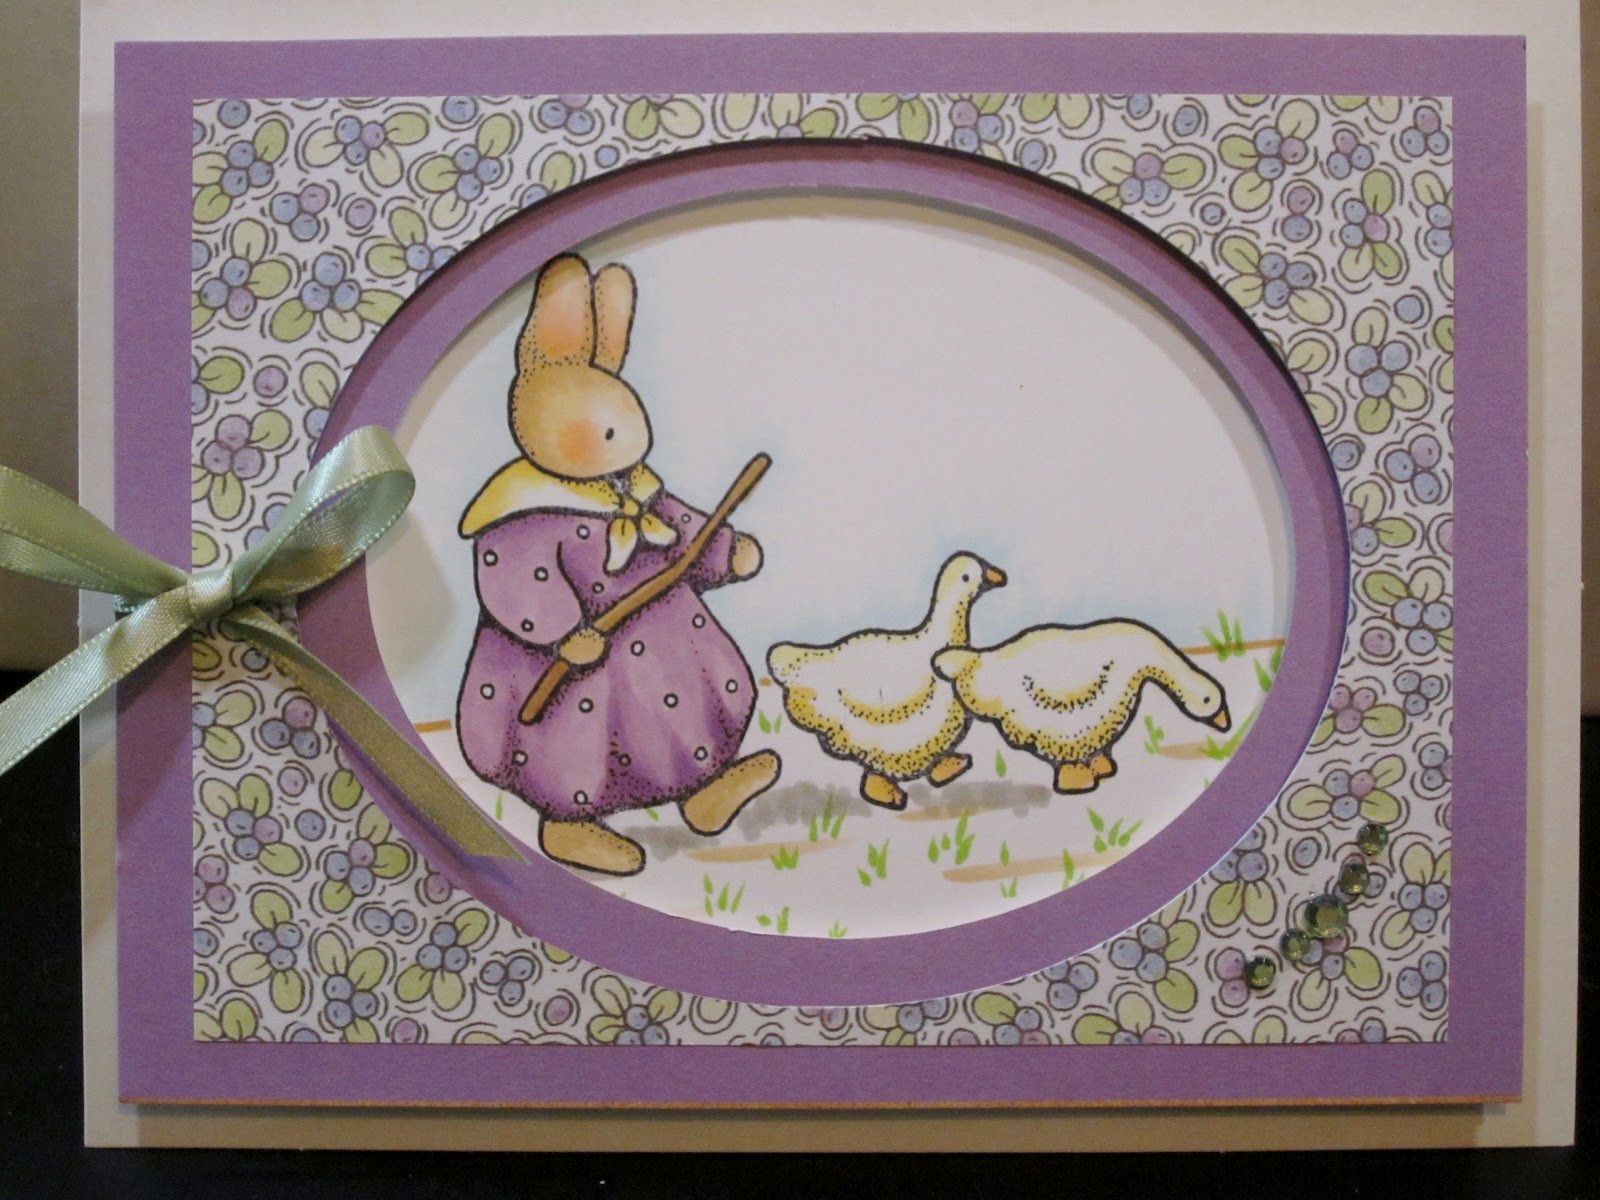
My image is colored with Copics, water color pencil for the boardwalk, and watercolor crayon for the sky. The leaves are all punched with a small punch from my stash.
Please pop over to Cuttlebug Challenges to check out what the other Designers have created, and to be sure to watch for the creations presented this week, when the five designers get the brand new Cuttlebug Folders! I am so LUCKY! I am one of the five, and am stalking the mailman! I have already colored images, just getting ready for when the folders arrive! I am so excited!!
Happy crafting~ and I'll see you soon!!

Monday, September 14, 2009

Warm Winter Wishes

Many thanks to my daughter, Barbie, for some beautiful new Inkadinkadoo Stamps! She said she couldn't wait to see what I would do with them, so I am tickled to post my first Holiday card! I had colored this Dustin Pike image with Copics a while back, but didn't know exactly what sentiment I wanted, and the "Warm Holiday Wishes" that came with this new set is perfect! I wish you could feel them, because the marshmallows are covered in flock, and they feel real! The ink is SU! Chocolate Chip, and the background inking is watercolor crayon. There is a nice smattering of Diamond Stickles for sparkle on the snowman, snowflakes, and the stars...I always feel sorry they don't show up better in the photos.
Well, I hope you are getting ready for some happy holiday wishes around your studio, too....
Happy crafting~


Sunday, August 30, 2009

Me and Carrie Lou Butterfly


I truly do love this image, and the way this butterfly has so many different looks. This time I used my Copic markers for the leaves and flowers, and then colored the wings with watercolor pencils to get the soft, delicate hint of color. The flowers were cut out from another stamping, and double stacked to give the card extra dimension. The green background was embossed with the brand new Cuttlebug Persia folder, which created a perfect frame. I added tiny "skittles" like dew drops to the corner, and that was it...no sentiment or other stamping...let this be a card for any occasion. I hope you like it!
Check out this stamp, and many other beautiful Victorian, floral, and holiday stamps at Me and Carrie Lou!... I'm going to Lakeland next week to get more :o)
I'll see you soon!
Happy crafting~

Tuesday, August 25, 2009

Edwin and Halloween


Here's my first Halloween card of the year! I love to play with things for the fall, and things that go bump in the night! These little vellum ghosts were cut from the Paper Doll Dress Up cartridge, which is one of my very favorites, though I doubt that I've made more than 3 dolls ever! It is loaded with extras like these pumpkins, ghosts, and tons of other goodies! The fence is a stamp, as is the witch, and I colored both with Copic markers.

Edwin is wishing Happy Birthday to my Son-in-Law, who also plays guitar and sings a great song or two!
I'll see you tomorrow for Be Inspired Wednesday at Cuttlebug Challenge!
Happy Crafting~