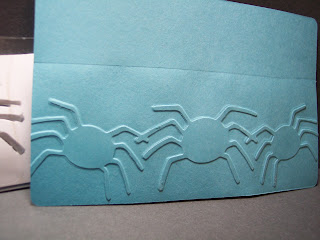
Spiders are three layers of cardstock thick, and the "negative" or the part that would be left on your mat after cutting out the spiders, is two layers thick. This should make the instructions a little bit easier to understand!


I saw the new Cuttlebug Folders that PC will be introducing this fall. I also chatted with some of the girls on the mb, and this is my idea on how to make your own folders for embossing with the cuttlebug! I cut three images. This time I used Doodlecharms cartridge, the spiders, on the border setting, because it gave me interlocking designs. This isn't necessary, but easy for beginning. I wanted to make an edge embossing design, not an all-over page design, but the concept would be the same. Glue two negative images (the part left on your mat after you take out the spiders) one on top of the other. Fold a piece of plastic packaging, such as a cuttlebug folder package, or some other heavy acrylic. Crease it tightly. Insert the negative image and glue onto one side. Carefully place one positive image (the spiders) into the negative "hole". Next put adhesive onto another positive and CAREFULLY glue it to the first positive image, then glue another positive image to the second layer. Now add adhesive, so that the positives glue to the other side of the folded plastic. This will give you two negative layers and three positive layers. It will all be lined up evenly, and ready to emboss in your cuttlebug. I found that the "sandwich" needed to be a C-plate, B-plate, folder with cardstock, piece of fun foam on top for thickness, then the second B-plate. It worked like a charm! (Sorry the black spiders don't show up too well with the stickles on them in the photo, but they are really cute!) Please post comments, and let me know how it works for you!!!
5 comments:
I love your sample. Though you lost me on the positive/negative part. I may give this a try. TFS!
I love what you've done here... would it be possible though, to see the stack..i/e., the individual pieces and how you put them together? I too was a bit lost with the positive/negative part...awesomely creative of you though!!
xxooxx Penny
Yes, I will be happy to post some more photos to make it a bit clearer. Give me just a little while :-) It is a whole lot simpler than it sounds....sorry!
I have edited the instructions, and hope that makes it easier to understand. Please leave me comments to let me know if you have further questions! Or send me an email!! Thanks,
BettyBee
Love this idea!! I'm gonna give it a try!
Post a Comment